Showing posts with label beading. Show all posts

Sunday, May 27, 2012

Flea Market Adventure


There's a flea market near our house each weekend. Mr.ShowMe and I decided to venture out to it today. It's blazing hot here, more typical of 4th of July weather than Memorial Day weekend. We figured we could get out to the flea market early and be back home long before the hottest part of the day. I found some real treasures and captured many more on film like this pressed glass compote. 
Here's a little peak of our adventure. 


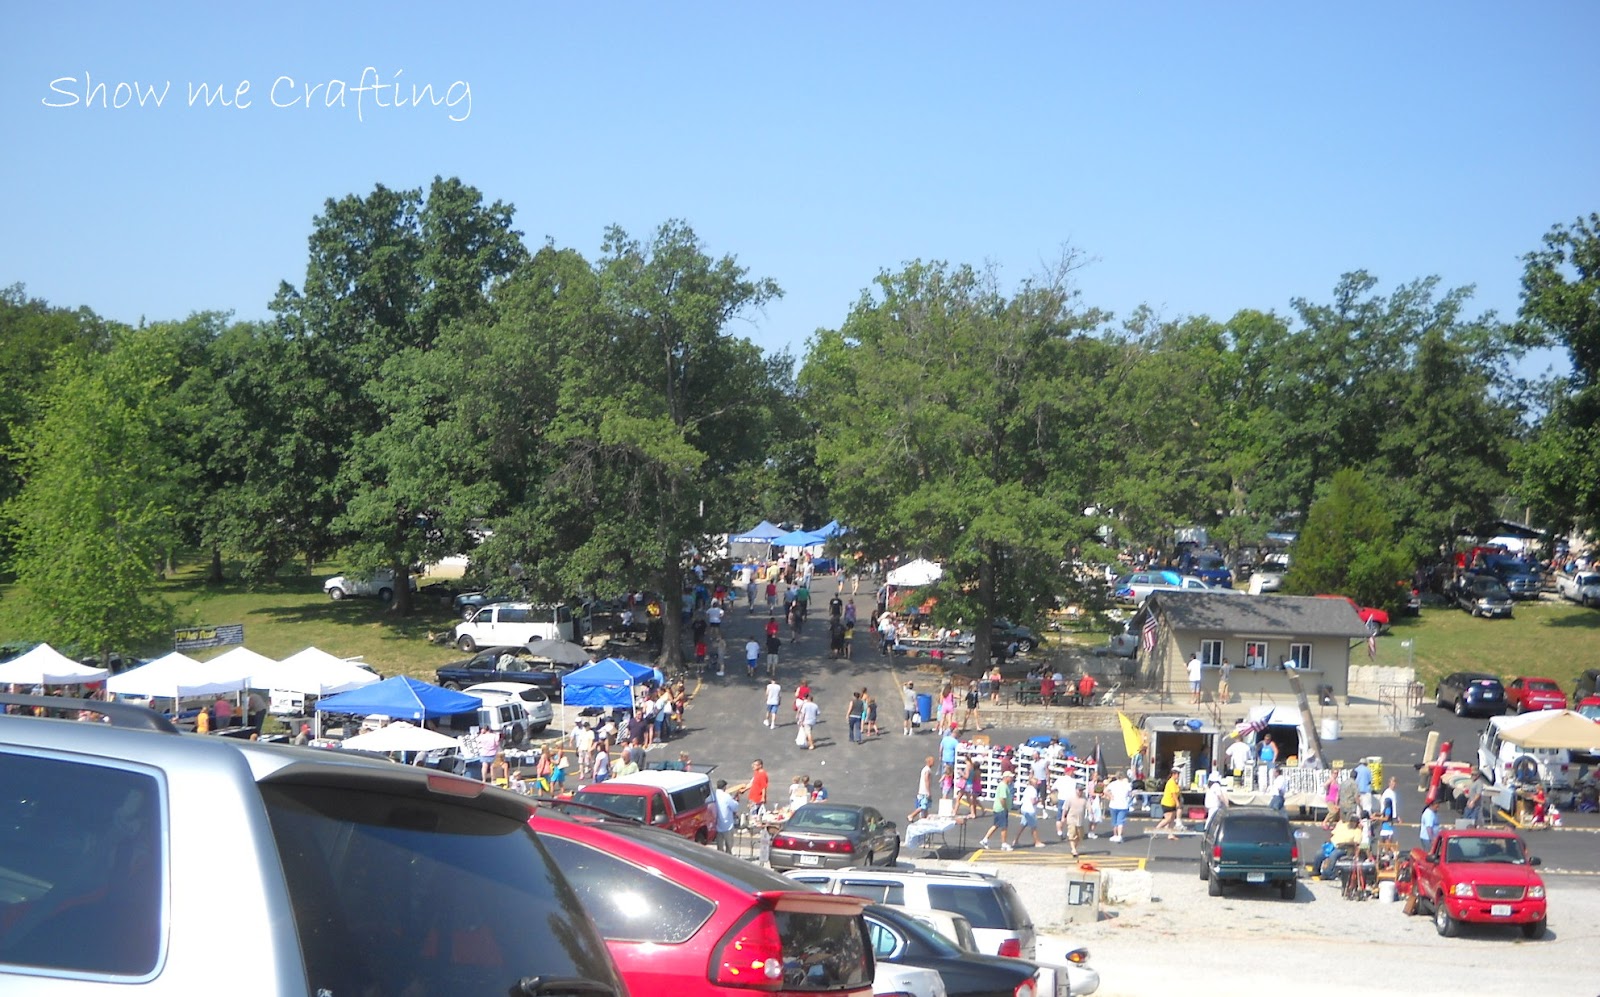
It's a popular place.

An old large domed glass oval frame with a baby photo. I always find these to be sweet, but a little creepy too.
 Some pretties placed on an antique dresser.
 Old cast iron.
 A doll house.
It wasn't all old items there. This dealer had fishing stuff, here's a just a few of his tubs of rubber worms.
An old pink grocery scale and a really cool stylized bird lamp base.
 Check out this neat old hat box!

And these gorgeous vintage dresses!
Several dealers had tables full of old oil lamps. These were particularly lovely.
Old teddy bears and their little black lamb friend.
The bright colors in this old painting really grabbed my attention.
More oil lamps.. these with metal bases.
This old Sante Fe railroad clock reads Hollywood Cal. on the face.
 This old rocker upholstered in red velvet was in really good condition.
I couldn't walk by without taking pictures of the old sewing machines.


Retro Anchor Hocking Fire King Tulip Bowls. (Their condition was so perfect, Mr. ShowMe and I wondered if they were repros.)

Here's an electric typewriter probably from the early 70's with the case and the proud union label from a time in history when we still manufactured things here in the U.S. and a World's Fair poster that might be a repro, but still had cool graphic images.

A really big wheel!
This dealer had a neat assortment of old, tiny, stuffed animals and had them arranged in and on a tiny wooden dresser.

Here's the items that were too tempting to leave behind.

A dealer had a basket of vintage fabric that contained a bag with 39 pieces of sample fabric. Each piece is 11" wide by 9" tall. There are 3 or 4 color variations of each print. I think they're upholstery samples. They're lovely and just the thing to use for some bags I'm going to make, (stay tuned for that!). They only wanted $2 for the bag, so they came home with me.
This tiny (3.25" diameter) Hot Springs souvenir plate came home with me too. It would have to be The Bargain Of The Day since it was free! I collect Florida souvenir plates, so I always look when I see one to see if it's from Florida. I just couldn't believe it when I saw it said Hot Springs. That isn't in Florida, rather Arkansas, but it's where I lived with my Grandmother when I graduated high school, so I just had to have it. When I asked the dealer the price, he told me, "It's yours". I tried to insist that I pay him something, but he told me again that I could just have it, so I quit arguing and put it in my camera case for safe keeping till I got home.
Old watches are great to craft with so at $2 that Elgin was mine, and when the dealer told me those disc earrings were only $1, I decided to find a second pair for the price and selected the turquoise drops with the red beads too.

So here's my whole $7 haul. (I keep telling Mr. ShowMe that I'm a cheap date. I think this proves it!)
The clamps and note pads for $1 rounded out the rest. I'm always scrounging around for clamps and clips to hold things until the glue dries, and I need to start keeping a note pad in my purse to jot things down when I have moments of inspiration for blog posts or purse & craft ideas.
I hope you're having a great weekend. 
Thanks for stopping by!

Monday, April 23, 2012

Beaded Tassel Earrings - Tutorial

I was inspired by some earrings that I saw on Pinterest and decided to try my hand at making something similar. They are beaded tassels. I made two pair and changed the process slightly after the first. I'll show you both methods here, in case you'd like to try them yourself.

You'll need two cones from the jewelry finding section at your local craft store. An assortment of embroidery floss and the beads of your choice. Other findings in the first pair included 2 jump rings, and 2 eyepins.
I wanted purple, grey and black, so that's my embroidery floss choices for the first pair. Cut your floss to lengths. You'll double each piece, and I'd rather cut off extra than have something too short, so I probably started with 12"-14" strands. Once you've got your floss strands cut divide them out for the two earrings, then put one grouping through each jump ring. You want them stationary, so take an extra piece of coordinating floss, wrap and tie it tightly up against the jump ring. 
I opened the eye on the eyepin and hooked it through the jump ring too. Then I tested it to make sure the entire jump ring would go inside the cone. At first it didn't, so I took my needle nose pliers and squeezed the jump ring until it did. Then, just to keep it from sliding out while I was beading, I bent the pin over to hold it in place.


 I wanted this first pair a little fuller, so I split each strand of floss in half to three threads each, (as you know, embroidery floss starts out as six threads). Now decide on your beads. I went through my seed bead stash and picked out the colors I wanted and just dumped out some into a shoe box lid. I didn't want the beading to be uniform, so I just made a pile. Then I was ready to start adding the beads to the tassel strands. 
Now, here's where my trial and error might help you. I was making my finger tips raw trying to wet and twist the ends of the floss so it would go through the tiny sead bead holes when I decided to try some school glue and it worked like a charm!
Squeeze a dollop out on a piece of cardboard.
Drag the end of one of the tassel strands through the glue.
 Twist the glued end and let it dry for about 30 seconds. (I would glue and twist 10 or so strands at a time then bead those all at the same time then glue more strands and bead, and so on.)
The process that seemed to work the best for me was, bead a strand, slide them up, figure out where the knot should go. Tie it, clip the excess thread away, then slide the beads down to the knot.


 Keep doing that until they're all done. Then repeat for the second earring. I just used my judgement on the length of the strands, I didn't want them exactly uniform, so I cut them accordingly. When I started on the second earring I kept the first completed one handy and just used it as my gauge for determining the lengths of the strands on the mate.
Cut off the excess pin length, bend it into a loop, and hang it on your earring wire.


For the second pair, I wanted to make them red, white, and black. I also wanted to bead the entire strand of floss and make this pair slimmer.


Because of the excess that I cut off on the pin on the first pair, I decided to try it without using a jump ring. I uncurled the eye at the top of the pin, just straight enough to go through the top of the cone. I formed a bigger oval shaped loop on the other end. Make sure it's thin enough to fit all the way into the cone.

Select your embroidery floss and cut the strands.


Divide them.
Put one group through each of the altered pins. Don't forget to tie it off to secure them.

Insert the threaded pins into the cones and re-form the loops at the top.
Glue the ends and twist them tightly.

 Select your beads.

 Start beading the strands.
 Decide on the lengths, tie the knots, clip the excess floss, and slide the beads back down to the knot on each strand.
 Hang the finished tassel on your choice of earring wire.

Then repeat for the matching one. Use the first one as your gauge on the length so they match.
If you try to make some for yourself, be sure and let me know. I'd love to see your creations.


Thanks for stopping by!


I'm linking up at Debbiedoo's Newbie party and all the others listed on my Link Parties page.